Yesterday I bought D'link pocket router dir-506l. I bought it to use with my Reliance netconnect+ dongle (Huwei EC1262).
D'link pocket router dir-506l comes with battery backup so it allows me to connnect to my Reliance netconnect+ from virtually anywhere.
I could configure dir-506l easily from my mobile web browser. But I found there is no option to configure 3g/4g networks. Similar to traditional routers this router has options to configure with dhcp/pppop/static/.... networks only. I've searched internet about the device support for Reliance Netconnect+. I found many others are in the same situation as mine and there is no solution.
Then I had a thought about upgrading to latest firmware. I've searched for latest firmwares for this product. My device has come with a firmware dated back to 2012 and 2.13 is the exact version.
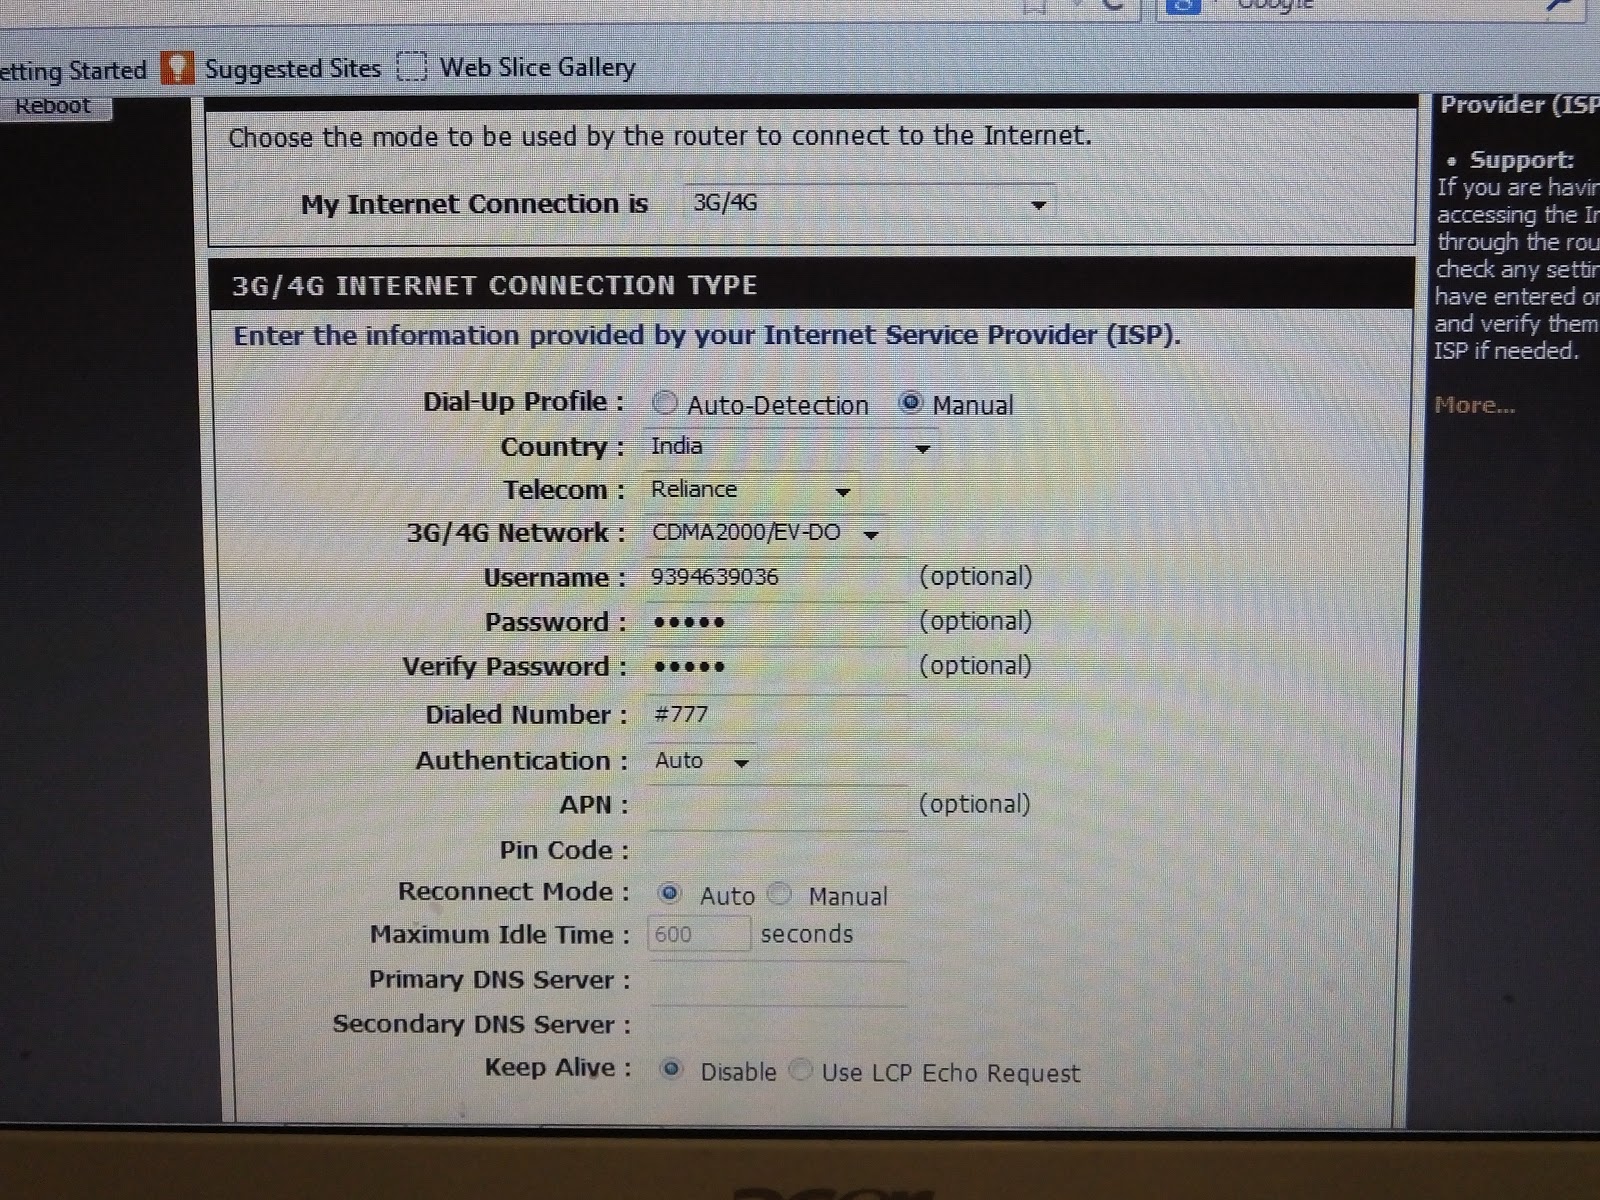
While searching internet I found a website http://www.dlink.com.au/tech/download/download.aspx?product=DIR-506L which has latest firmwares released Upto 08/july/2013 and the latest is 2.15 version. There also I found compatible device list. In compatible devices I found Huwei EC1261. This is not exactly my device. But I thought to go with 2.15 version. I've downloaded it and upgraded it by connecting to the device through Wi-Fi even though recommended for firmware upgrade is through wired connection. Once upgrade is completed I've reset the device to factory settings by pressing reset button for 10 seconds. After that I connected from my Mobile phone to the device through Wi-Fi. Now I am able to see 3g/4g mode in the internet settings menu. I've selected this mode and selected manual configuration. There I configured my Reliance netconnect+ details. Once these settings are saved the router rebooted and connected to the internet.
D'link pocket router dir-506l comes with battery backup so it allows me to connnect to my Reliance netconnect+ from virtually anywhere.
I could configure dir-506l easily from my mobile web browser. But I found there is no option to configure 3g/4g networks. Similar to traditional routers this router has options to configure with dhcp/pppop/static/.... networks only. I've searched internet about the device support for Reliance Netconnect+. I found many others are in the same situation as mine and there is no solution.
Then I had a thought about upgrading to latest firmware. I've searched for latest firmwares for this product. My device has come with a firmware dated back to 2012 and 2.13 is the exact version.
While searching internet I found a website http://www.dlink.com.au/tech/download/download.aspx?product=DIR-506L which has latest firmwares released Upto 08/july/2013 and the latest is 2.15 version. There also I found compatible device list. In compatible devices I found Huwei EC1261. This is not exactly my device. But I thought to go with 2.15 version. I've downloaded it and upgraded it by connecting to the device through Wi-Fi even though recommended for firmware upgrade is through wired connection. Once upgrade is completed I've reset the device to factory settings by pressing reset button for 10 seconds. After that I connected from my Mobile phone to the device through Wi-Fi. Now I am able to see 3g/4g mode in the internet settings menu. I've selected this mode and selected manual configuration. There I configured my Reliance netconnect+ details. Once these settings are saved the router rebooted and connected to the internet.